Showing posts with label Chair Reupholster. Show all posts

Tuesday, May 22, 2012

Adventures in Reupholstery

Remember WAAY back in January when I announced I was going to attempt to reupholster a chair here. And then again in March when I actually started the project by painting the chair here. WELL I finished my chair on the weekend and am SOOOOOO HAPPY with the results. It was definitely an adventure as I literally have NO idea what I was doing when I started this project!! Now it isn't perfect but I am very proud of myself!!! SO first lets recap what I started with, here is the chair that had been sitting in my basement for way too long collecting dust.


Then I sanded it down, and primed and painted the arms and legs white.  Next came the part where the chair sat in my living room because #1 I didn't have a staple gun (yes I know how could I 'Miss Crafty Pants' NOT have a staple gun!!!) and more importantly #2 I have NO IDEA how to move further!!!  Well last week I went out and bought a heavy duty staple gun for this and other projects!  On the weekend I woke up and decided what am I waiting for lets get this baby done!! 

Now I would LOVE to be able to give you details on how I reupholstered this bad girl (yes the chair is feminine!) but I honestly don't know what I did... I did a little of this and that until it looked good.  SO here is my best rundown of this project.

FIRST I placed my new fabric over the seat cushion of the chair and loosely tucked it around. Then leaving WAY more fabric than I needed I cut a piece in the approximate size of the seat cushion. Then I started to staple and pull and tuck... yes I know not helpful details I realize! Ultimately I started at one end, pulled the fabric tight and stapled then I worked my way around the seat stapling. When I came to around the legs I cut sections of the material so it would lie flat but under the raw edges of the material that hit the arm of the chair so it wouldn't fray. Around the legs of the chair I stapled the material and then cut away the excess afterwards as I knew I was going to be putting trim around it there to cover the staples.  See my nice folded corner below.


Next it was time for the back of the chair.  I had NO IDEA how to duplicate the pleats. So first I started off by laying my material over the chair and using a ruler I tucked the fabric into the pleats for the meantime.  Next I started stapling the fabric around the back of the chair and cutting off the excess.  This was actually easier than the seat of the chair! 

Here is the back of the chair (sorry the picture won't turn the right way for some reason!).  After I used a large needle and just tacked the pleats in place at the bottom.  I didn't need to do anything at the top because of the way I stapled it to the back so just a few stitches in the bottom crevice of the pleat worked well!


My chair was looking impressive! It wasn't perfect ... but I was happy with it thus far!  See my slight oops here... I didn't pull the fabric tight enough and it puckered... but its so small it isn't that noticeable. Plus that side of the chair will be against a wall anyway!
+

Then it was time to do the back of the chair.  This was the easiest part! I just pulled the material tight against the back and stapled it up the sides and at the top. I knew I could cover the staples with the decorative trim so I didn't mind stapling it at the top.


After about an hour and a half I had transformed my chair into THIS!!!!


 But I wasn't done yet, you could still see the staples! Next I pulled out the glue gun and glued my trim around the edges covering MOST of the staples.  Like I said before this was my first attempt at reupholstering and some of my staples were further in that they should have been... BUT for the most part the staples are covered! I glued under the raw edges to make it look more finished as no one wants to see raw edges!


It was done and I am VERY proud of myself!  So to save yourself having to scroll back up.
BEFORE


AFTER!!
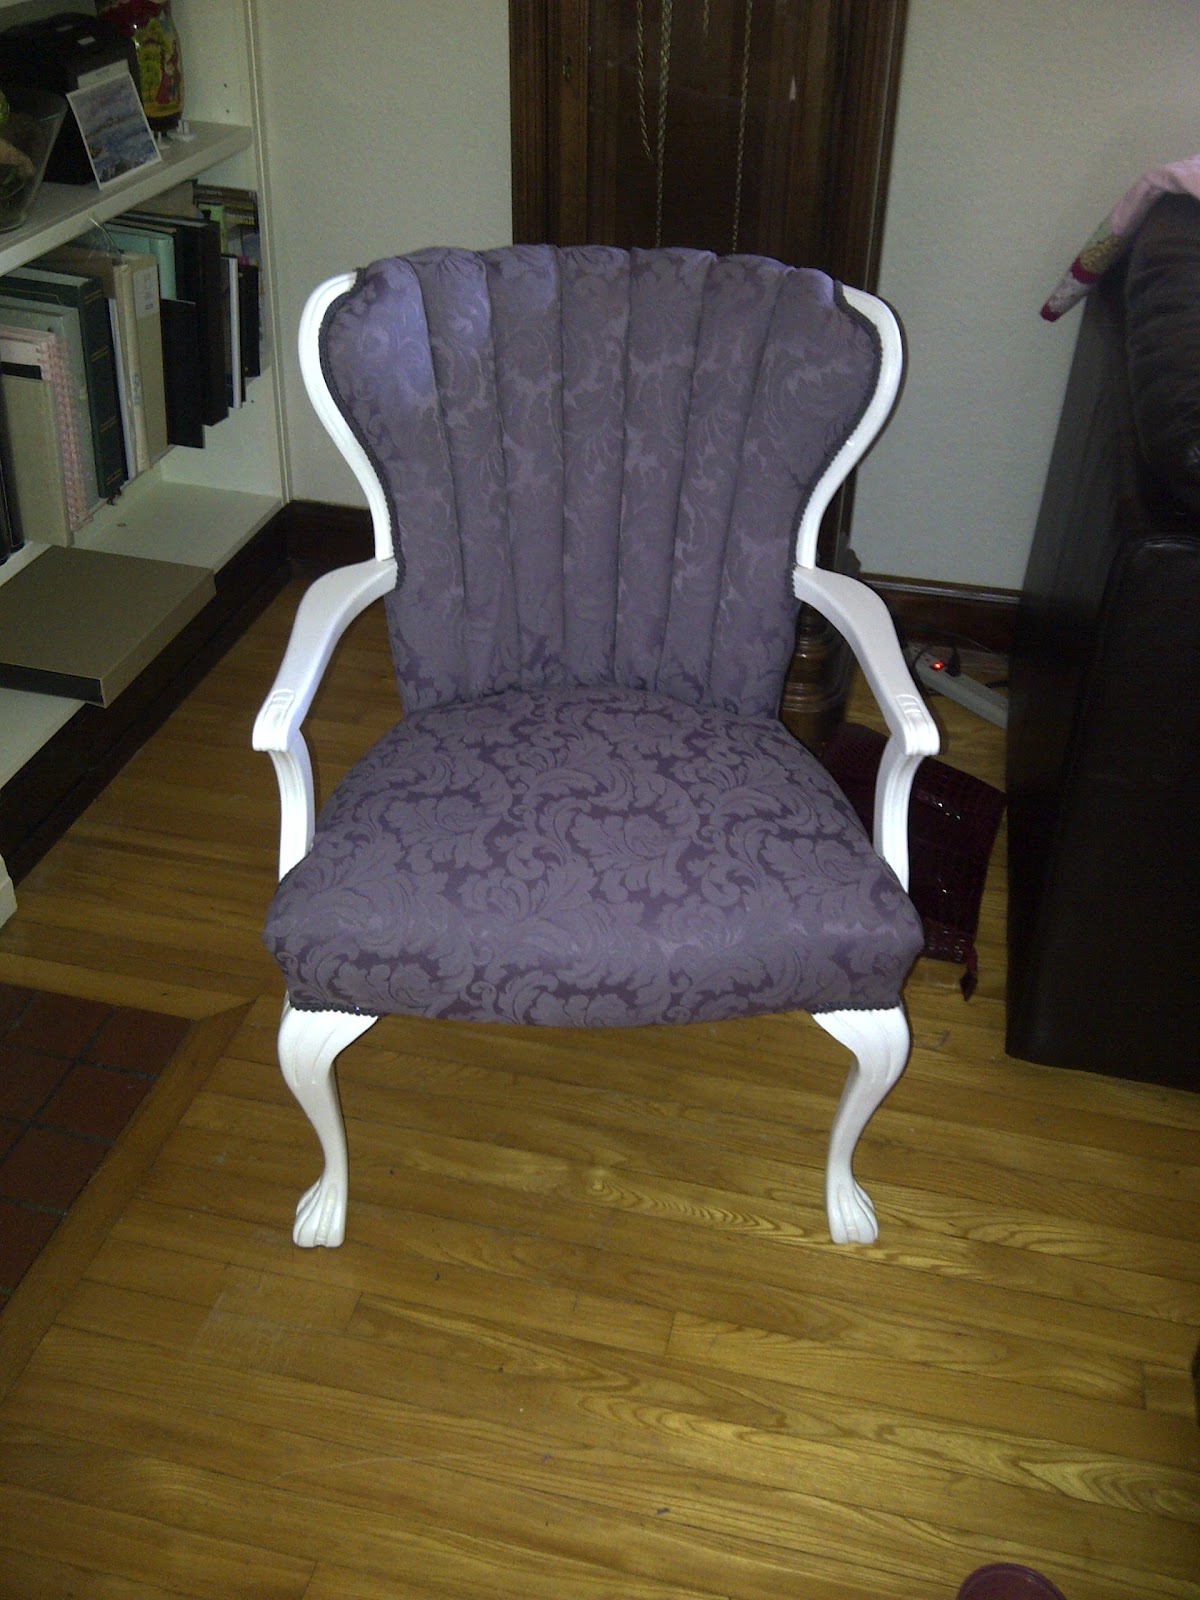


Now I just need to clean up our bedroom and make room for this beauty!!! 

Tuesday, April 17, 2012

Stain or paint???

I finally got around to recovering all of our dining room chairs and I couldn't be happier!!!  I had previously mentioned that 3 of our chairs are different than the others but only slightly.  Below you can compare the 2 types of chairs, one is ever so slightly taller with a different back rest. But only when they are side by side can you actually tell. 


So this is the dining room as it stands today!
The table needs to be refinished this summer and the chairs do as well.  I'm now in the debate whether I should restain the table and paint the chairs a creamy white or just restain everything....


I love the look of white chairs with a dark table I'm just not sure if I'd LOVE it in my dining room.... I found these photos at http://www.livecreatingyourself.com/2009/09/kitchen-table-redo-dark-table-light.html and love the look. I just love the light airy feel to the white chairs!

I think creamy white chairs would look amazing and would bring out the green/blue in the chair pads but before I paint over wood I always have to think long and hard about it! What do you think??
Yes Ryan popped into this picture to say hello!

Monday, March 19, 2012

Dining Room Chair Reupholstered

I accomplished a lot this weekend despite a teething toddler who spent a lot of time melting down over the weekend!!!  Poor baby girl!  Between meltdowns I go a fair amount accomplished. I will post an update on the church pew progress later.  After looking at all of the material I purchased for the cushion for the outdoor pew I realized I bought WAAAAY too much material. I'm not sure what I was thinking.... I knew the pew was approximately 8.5 feet long.  Converted to metres that's about 3 metres... however I picked up 6 metres of fabric.  Who knows what conversion I was using at the time!!!!

So after measuring it out I decided the fabric would look GREAT on the cushions of my dining room chairs!  Now we have 7 chairs, 4 came with our table and the other 3 we found at an antique store for $25 each and they are ALMOST identical.  However the 4 original chairs have a cream vinyl on them and the 3 newer chairs have a flowery material on them.  I figure since I have the fabric and love it lets match up my chairs.

Here is the one chair I took a stab at on the weekend.

Since I wasn't entirely sure what I was doing I figured I would test it out on one chair first before taking all of my chairs apart.  First I unscrewed the seat and pulled the old fabric off of seat.  The cushion was in great shape, the hardest part about this was taking the old fabric off... it was secured in place with I kid you not 100 plus staples!!!!!  Next time I'm using a staple remover and not my fingers!!! 

Next I used the old fabric as a template to cut out the new fabric.  Wrapped it around and using a friends staple gun (Thanks H) in a matter of 5 minutes I had accomplished this. Without using 100 plus staples!!!

The corners were a little tricky but I used the same technique the old material had been secured with and it worked nicely!

 Then I put the seat back onto the chair and realized 'oh crap the stripes are slightly crooked'.... Oh well. This was the first chair so with the next one I will make sure to put it on straight.  But I love the end result!!!
Now I just have 6 more chairs to do!