Tuesday, July 23, 2013

Big Girl Room Complete!

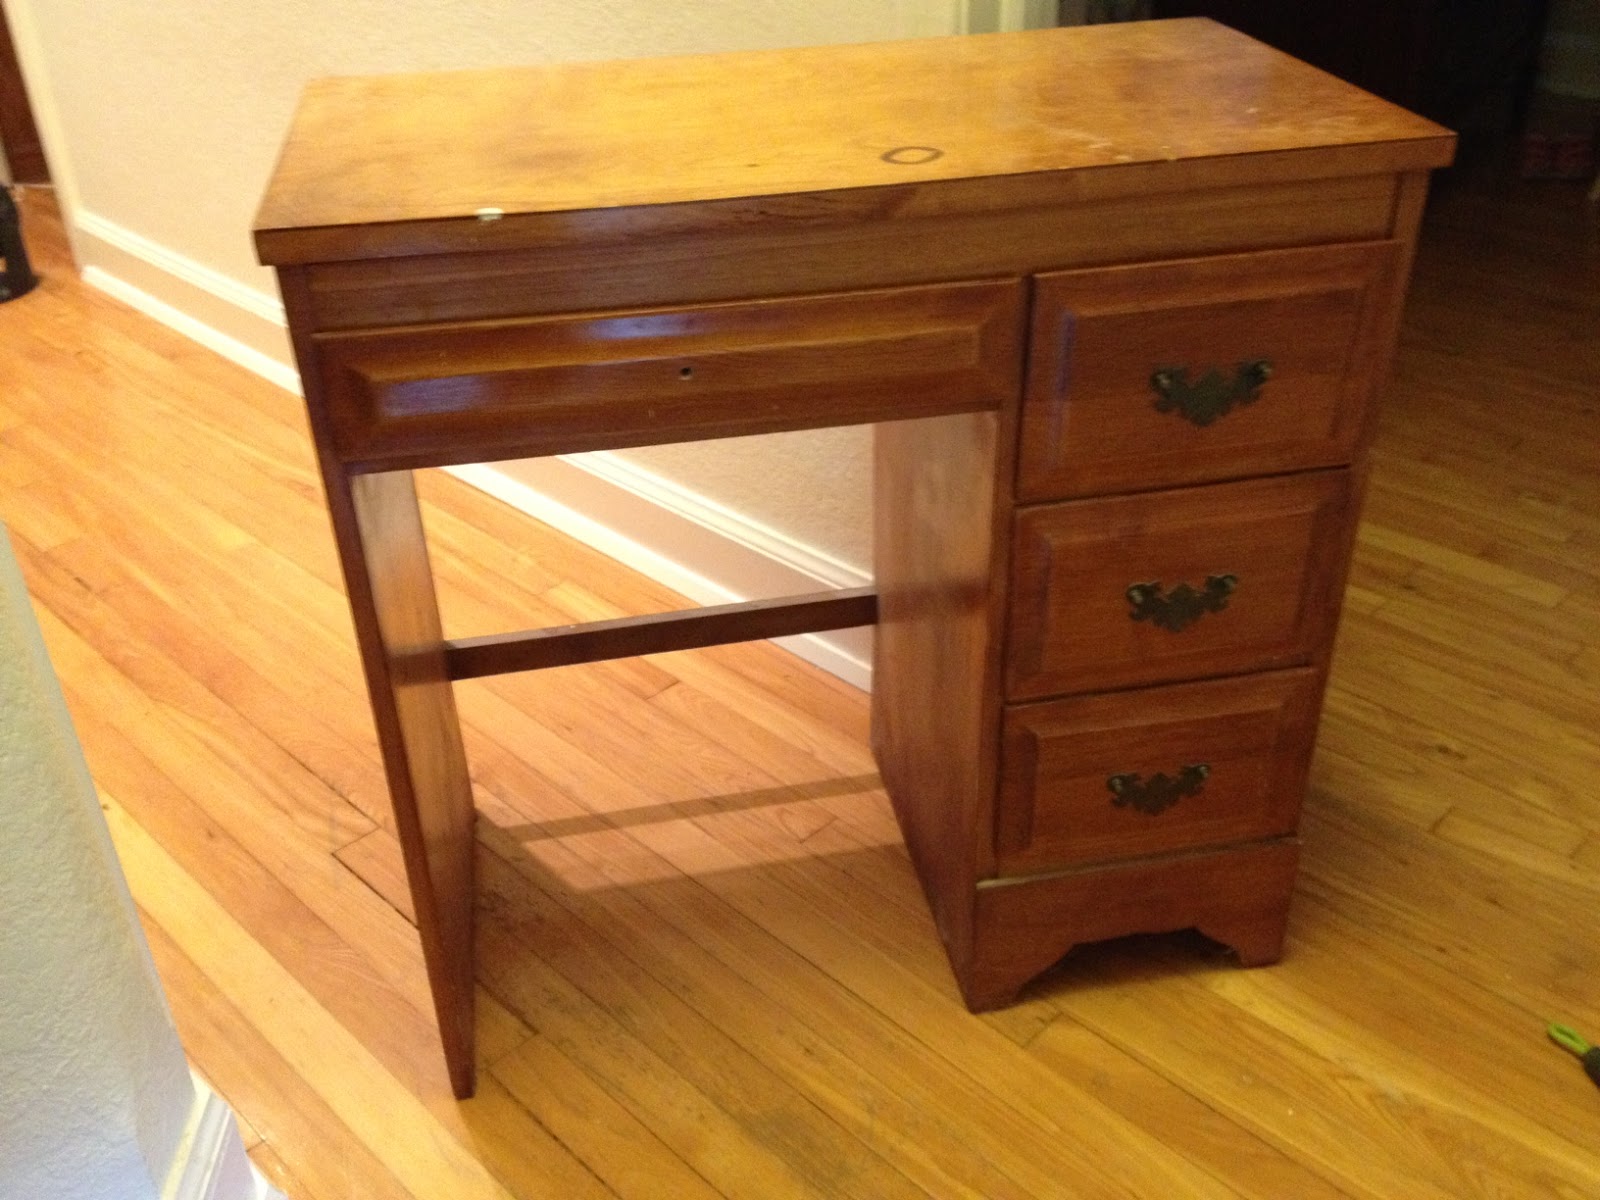
This is a story of a little lady... Ok I'm totally singing the Brady Bunch theme song right now!  My little ladies big girl room is finally (mostly) complete!!  After painting/staining her dress (see here) I have been desperately wanting to work on this little desk that was Ryan's moms desk when she was little. 


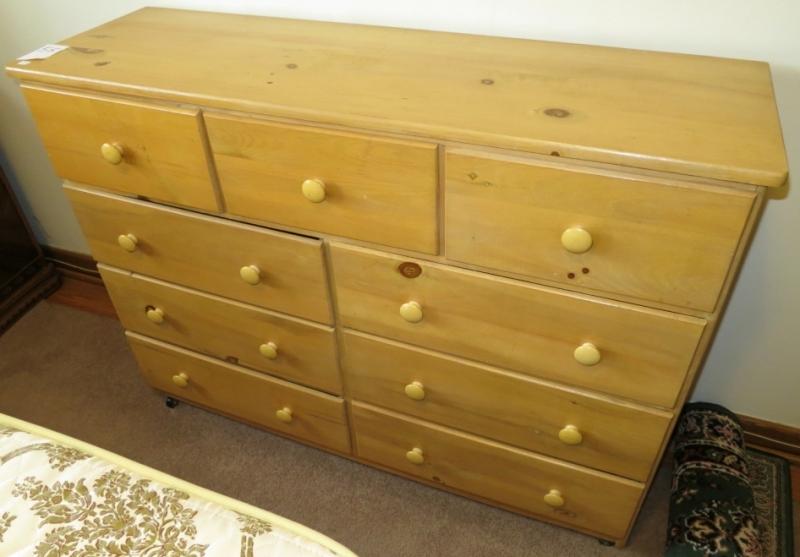
This dresser needed a little love, about a year ago my dad repaired one of the drawers because it was in 5 different pieces.  Then it sat in Norah's room... untouched and completely unused. Its hard to tell but the hardware on the drawers is broken... as in there are no actual handles!  So I knew that would be a challenge for me. And so it sat this way since we moved into the house almost 2 years ago.

Until this weekend when I decided it was time to make it match the dresser we redid for Norah.  I asked Ryan to pull out the primer and paint while Norah and I went to a playdate Saturday morning.  I came home to find that my loving husband had primed and painted the whole thing. 

GREAT... wait... NO... NOT GREAT!! The plan was to make it match the dresser and the dresser we stained the top!! AHHH! This is when I learned not to leave my hubby home with paint and no direction!! OOPS! At first I thought well maybe I'll just stencil something fun in purple on the top to match the room. So I slept on it, and when I woke up Sunday morning I looked at Ryan and simultaneously we both agreed we needed to sand the top and stain it like the original plan. I figured meh its a small desk I should be able to sand this bad boy down no problem... I pulled out the power sander and almost 2 hours later it was sanded... Yep you read that correctly... 2 hours!!! That zinsser primer is MAGIC!! My sander barely survived!!!  We were back to this!


And after one coat of stain it was looking pretty awesome! But of course we did a second coat.


As for what I did with the handles (sorry for lack of photos I was too excited!)  I filled the double hole that the old handles had in with filler, sanded it down and painted the drawers. Then Ryan measured for a new hole in the middle.  Luckily I still had ONE green and white polka dot handle left over from the dresser so at least one of the handles would be the same as the dresser. Remember I wanted these babies to tie together. And we found in our basement 3 left over silver round simple knobs... we can't actually figure out where they came from but they have been in our stash since the old house. I thought they were from our current kitchen but they aren't the same... the mystery of the silver knobs!! Anyway!  This project was ultimately free!! We had the stain, the primer, the paint, the knobs!!  I love free projects!!! Ain't she purdy!!!! You might notice the bottom drawer has a missing bottom edge... we couldn't do much about the missing edge so just left it as it was... its hard to tell unless you point it out. Maybe I shouldn't have pointed it out... oh well!


And with that this bedroom is DONE (other than needing a new light fixture which I'm desperately on the hunt for but haven't found just what I'm looking for yet!).

This is Norah's desk nook complete with:
  • The white shelves on the left were the book holders from the back of the church pew that we have on our back deck (here) which we painted and hung. 
  • There is a chalk board made out of simple picture frame with chalk cloth in the middle. 
  • My pretty little butterfly art that I made similar to this.
  • The NORAH letters my mom picked up for us at a warehouse sale for next to nothing which I Mod Podged in left over scrap paper. 
  • In the frame is a photo my brother and sister-in-law took of butterfly eggs on a leaf when they were in Honduras (ok I just realized the photo has fallen crooked in the frame... mental note... fix it!)
  • A wood cut out of a butterfly that Norah painted and a peacock feather we picked up at the High Park zoo.
  • And finally the purple metal flowers that I picked up on a clearance rack at Bouclair Home. Which is the only thing in the entire area that I actually spent any money on and I think they were $5 total.  

Now to show the other side where the dresser is. We have the following:
  • The dresser that we made over which cost less than $20
  • A butterfly painting made for Norah for her 2nd birthday by my ever so talented friend!
  • The light switch which Norah painted ever so nicely in pink and purple!
  • The mirror we saved from the trash when our old neighbour was getting rid of it. Its a solid mirror that was hideous in a yellow gold paint that we spray painted white.
  • The lamp was a shower gift before Norah was born which is super cute and has a bunch of animals on it.
  • The random butterflies my mom gave to Norah awhile back that she had used for a wedding shower.


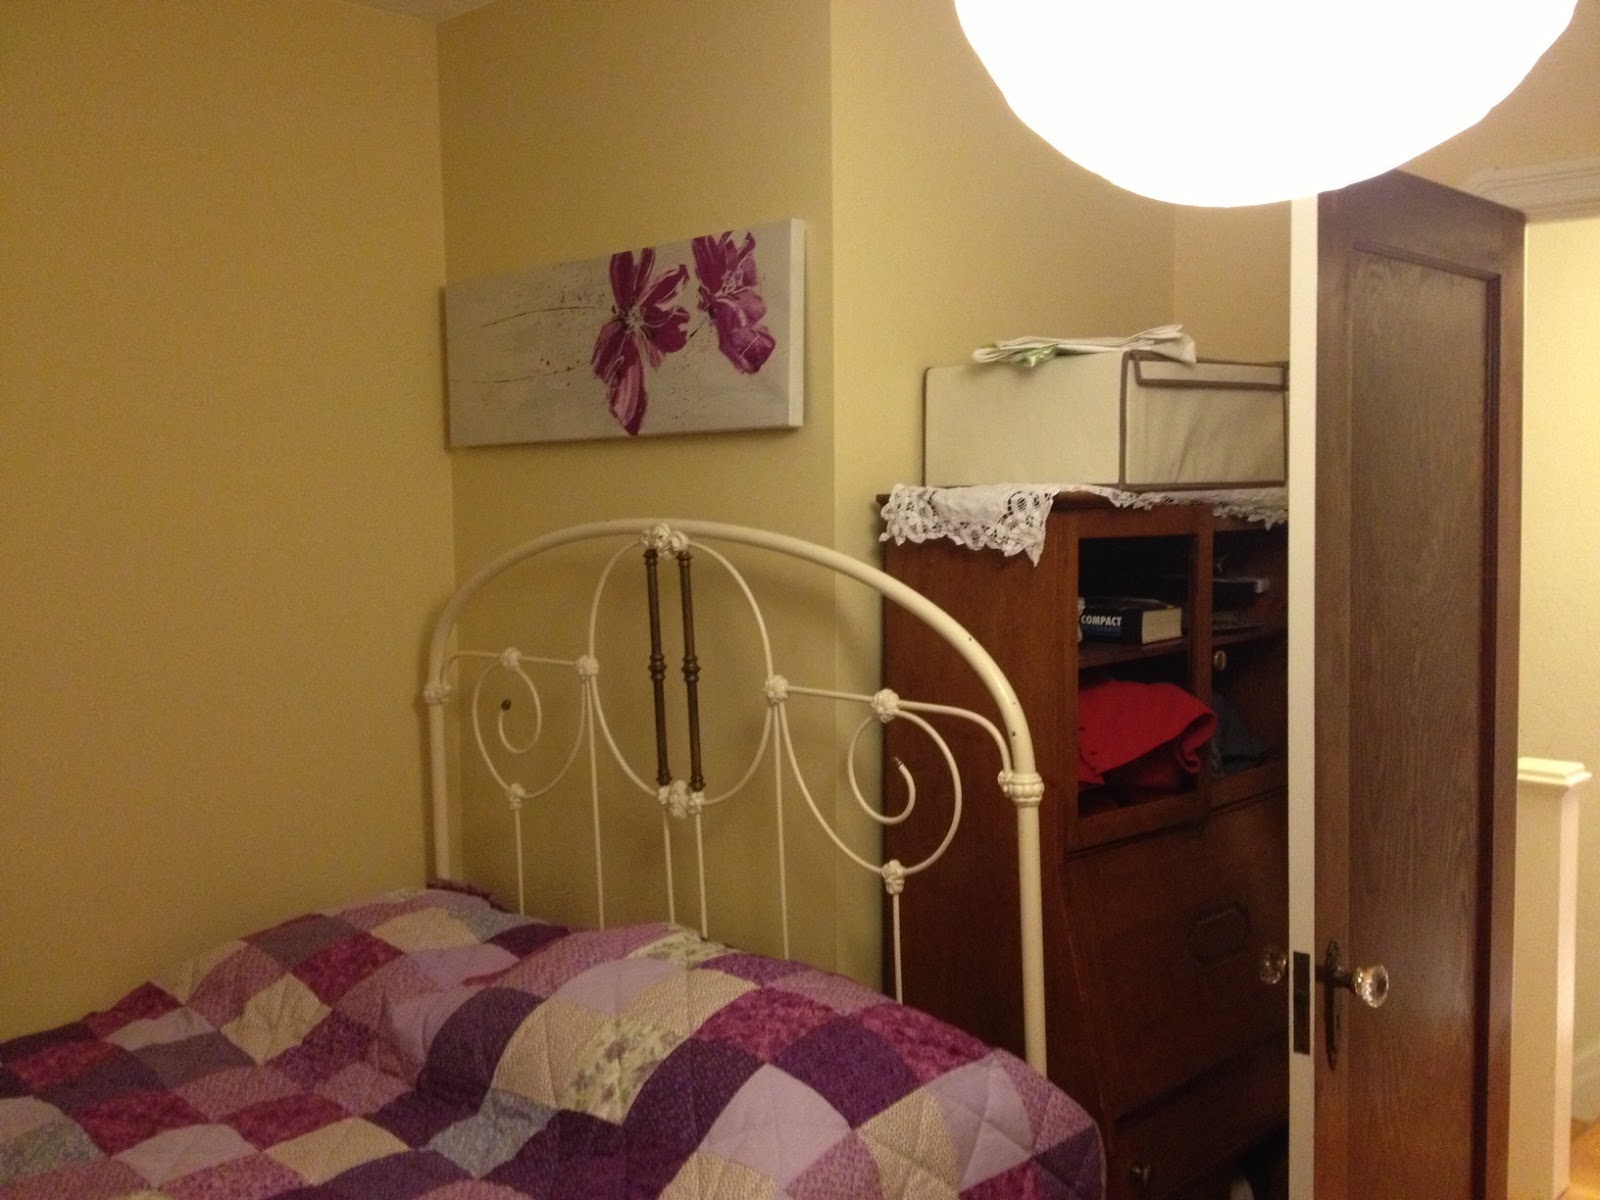
This is the view from the bed, see I need a new light fixture... that one is a simple white shade that I added purple ribbon to for now but its cracked and isn't anything special. I want a white chandelier but I haven't found any that I am willing to fork the cash over for... I'm perfectly happy painting something just haven't found one that works yet!


The famous butterfly tree that I painted for Norah!


Her bed nook.

And the other 'corner' The desk that is behind the door will eventually go but for now its the only place it fits so its staying. So just ignore that!


The cost breakdown:
* Desk - Free
* Dresser - About $20
* Metal Purple Flowers - $5
* Canvas above bed - $20
* Book Shelves - Free
* Art - Free
* 2 Wood Butterfly Cutouts - $4 total from Dollarama
* Quilt - Free (given to Norah by Grandma and Grandpa)
* Curtains - came with house!
Total Big Girl Room Cost: $49!

I love using what we've got to make over a room!!!

Friday, June 14, 2013

Floating in the Clouds

After making sooo much progress on the baby's nursery so quickly I kinda just shoved the room full of baby crap and closed the door... literally. It was (and still is) a storage room for all things baby!  But this week when Ryan decided to take Norah for a walk in the rain (its been soooo rainy here lately he decided to bite the bullet and just go outside in the pouring rain anyway) I got my crap together and pulled out the drill to FINALLY hang my cloud shelves!


Before I get to that I should explain how the cloud shelves were made.  I can't take much credit for them at all! When we moved into the house out in the shed were two random pieces of wood, one cut into a blob and the other one was supposed to be a smurf's (remember them) head. I only know it was supposed to be a smurf's head because it said 'SMURF' written across it. They were both painted brown and we were going to throw them out... but Ryan kept them for whatever reason. THEN when I decided to do a sky themed room Ryan pulled them out and the original plan was to just paint them white and hang them on the wall. Until I came up with the shelf idea.  Ultimately all we did was cut the 2 pieces in half and hang them on the wall using L brackets.  They look fantastic!!! SUPER simple since we didn't have to cut out the shape to begin with!

Now as for where I wanted to hang the shelves... I am lazy... and I didn't want to have to finally fill in the holes from where the old owners had shelves hanging... so I used their holes for one of the shelves right by the doorway! This was the 'smurf' shelf! I still need to do some touch ups on it but it looks amazing!


The other shelf I hung above the change table so I can keep creams etc up there out of babies reach.  I also hung a canvas that my friend bought for baby that suites the room perfectly!!  I actually already had screws in the wall to hang the canvas which was perfect. Now I just need to paint more clouds on that wall.
 

Finally I got around to hanging the rain cloud mobile I made awhile ago.  I opted to hang it above the change table so baby can look at it while I'm changing her.  (Please ignore the mess... the room as I said earlier is still a disaster!!)


So that is it for now! I just need to paint a few more clouds and Ryan needs to finish spackling the crown moulding. I also want to add a valance to the window eventually. Then its cleaning and organizing the room because it is 100% a disaster zone!!!

Monday, May 27, 2013

Under $20 Dresser Makeover!

This weekend was cold but BEAUTIFUL outside! Which made it the perfect weather for this pregnant lady to work on making over a dresser for Norah!  Just to remind you I purchased this 'beauty' at an online auction for $6!! YES that is correct! $6!!!


It was the perfect size and had plenty of small drawers that Norah can easily open herself.  I was super excited when we won it!!  First up we (read: ryan) hauled the dresser outside and Ryan sanded the whole thing down.  Originally I had planned on painting the whole thing white but after the finish on the dresser came off SOOOO easily we changed out plan. 

Side Note: Ok I just spent 10 minutes trying to get these photos the right way and when they are turned the right way they end up being stretched and blurry... argh!! So you'll just have to deal with 2 sideway pictures!

The new plan was to stain the top of the dresser and then prime and paint the rest white.  I started by staining the top with a Minwax stain and seal in one. We had a can left over from when I helped a friend stain her bed.  This was after one coat... it always looks ugly after only one coat!!


Then using Zinsser Stain Cover Primer I primed the sides and front of the dresser as well as all 9 drawers. I managed to get that all done during Norah's nap on Saturday!! 


Then Sunday morning I did a second coat of stain on the dresser and painted about 5 drawers before having to head off to baseball and gymnastics.  So during Norah's Sunday nap I painted the rest of the drawers and the dresser with their first coat and did a second (and final) coat on the 5 drawers I had painted in the morning.  Then I sat in the sun enjoying the warmth for about 10 minutes before the little lady woke up!


I finished painting the drawers when Ryan decided to take Norah to the park for a bit later in the afternoon!  After it dried we lugged (not the right word because its actually an incredibly light dresser) it upstairs and I put new knobs on the dresser. I had picked as many of these lovely handles up at a warehouse sale months back!! I used a few for the play kitchen I made for a friend (here) but I had a tonne left. They look exactly like these but I used lime green and grey ones with white polka dots. They are ceramic knobs and I have found them online for around $3.50 each. I however picked up as many of these as I could for a whopping $0.69 EACH!!!


 I didn't have enough of one colour so I alternated the green and grey knobs and love how cute it turned out!!


Just so you don't have to scroll here is a before and after photo!

Now I just need to move Norah's current dresser downstairs to make room for this baby! She loves it!!!
As for a cost break down:
Dresser - $6
15 Knobs (at -$0.69 each plus tax) - $11.70
Primer - Had on hand from one of many projects
Paint - leftovers from one of many projects
Stain - left overs from one of many projects
Total Cost - $17.70!!! I couldn't be happier!!!

And to leave you with a pretty photo, we took Norah to the park to fly a kite Saturday morning and she couldn't have been happier about it!!!!

Friday, May 10, 2013

Weekend Updates

Last weekend we took a step back to enjoy the GORGEOUS weather that we were finally presented with!!  On Saturday morning we were randomly all up ridiculously early so we headed to High Park to check out the Cherry Blossoms. Oh they were soooo pretty!! It was fantastic to get out!!


Then we went home to play in the backyard. Thats when I came up with a brilliant idea!  I have been missing out vegetable garden in from our old backyard so I decided it was high time we created a garden in our new backyard.  I knew the perfect spot was right next to our fence because in the summer its one of the few places that gets sun since our huge tree covers almost everything!!  So while Norah ran around playing in the backyard I grabbed a shovel and started to dig up and till about a foot wide section all along the fence.  About 2 feet along I realized I was STUPID for starting this... holy crap tilling up grass and dirt is a LOT of work!!!  But I kept at it!

While I was sweating away, Ryan started to pull up the stones that were in front of our shed. I don't know if they did a crap job of laying the stones or if years of frost has moved them but they were a mess!! Many toes and little knees have been scraped and bruised on the uneven stones that were there. You can kind of see the unevenness in the photo below, but in some spots the stones are about 2 inches up!

Ryan pulled them all up, planted grass seed and then started using the stones to edge in my new vegetable garden.

Here is a not so finished photo of my garden.  I did end up tilling the ground more plus we added some new dirt to the top but I couldn't be happier with it!!!  Mind you I was EXHAUSTED by the end of the day!!!


I tried to get a picture of it from the deck however since the sun was in a bad angle all you can see is shade!!  Ultimately the garden goes from where Ryan is standing to about a head of the shovel in the far left of the picture below! Thats almost 30 feet of garden right there!!! I've got loads of vegetables to grow this year!!!!!


Then after it was all said and done it was time to relax!  We turned our hot tub temperature down low so Norah and I can enjoy it as well!!!  Norah LOVES it!! She calls it her mini pool!


This weekend we are hoping to actually install the basement floor for the LAST time!!!  Fingers crossed!!  If the weather cooperates I have a dresser to paint as well.  I picked this lovely lady up at an online auction for a wonderful $6!!!!!  We just have to pick it up Saturday and she's all mine!!! I plan to paint her white and put some fun new knobs on. I may even do a fun purple accent on the drawers... not sure yet!  Its for Norah's room so we can get rid of the one that is broken!!


 Have a great weekend everyone!

Monday, April 29, 2013

Front Hall Heaven!!!!!

I can't express how completely awesome and talented my Dad is!!!!  As you know (from my past post) my Dad was coming this weekend to install our custom made front hall closet that he made!  I was super excited for it and it turned out WAAAAAAY better than I had imagined it in my head!! To take a step back I want to remind you that I more or less designed this baby.  I had an idea, I drew a ROUGH sketch. Then I gave it to my dad, who took my rough sketch and turned it into actual plans.  Then he built it!  He even said he spent more time on the plans than he did on actually building it.  The trick with this was that he couldn't just build it and then bring it into the house. He had to build it in pieces in his workshop so that it could then be installed at our house.  I still can't believe how amazing it looks!

Just to recap, this was what our front entrance looked like before.


We had a crappy 10 year old Ikea wardrobe and a white bathroom cabinet for storage. Lets just say the shoes were ALWAYS everywhere and the coats were permanently hanging on the stair banister!


I wasn't at the house for the entire installation process as Norah had dance class and we had to run some errands. But I came home to this. The sides and back had been installed.


Here is my Dad and Ryan installing the door frame and doors. They had a few issues as my walls aren't square and my floors/ceiling aren't level either. But with a little trimming and a lot of jimmying they got this baby done.


So without further adieu, here she is!!!  We have LOADS of storage up in the top cabinet for out of season items. Plus we have shelves up the side that I put baskets in to store all our hats, mitts, umbrellas, purses etc. We added extra glass door knobs that we had in the basement. Those knobs are on every door in the house so it was only fitting to add it to this door too! We did add the same knob to the top cabinet as well but apparently I don't have any pictures of it.... We still have to put the crown moulding back up, add some trim to the edges and caulk it all so it actually looks built in. But isn't she PURDY!!!


Here is the view from the stairs.


My FAVOURITE feature about the entire thing is my hidden shoe shelves. This was definitely one of my best ideas yet!! Since it is a corner closet, I knew there would be wasted space in the back corner. I hate wasted space! So I told my dad that it would be great to be able to store shoes back there if possible!  He put small shelves in the back that hold 1-2 pairs of shoes.  It just gives us that tiny bit more room maximizing the space!

Miss Norah definitely approves. It is her new favourite hiding place!  She loves that she can put her own shoes away and so do I!  I plan to put a hook inside just off to the right where she can hang up her own coat too.


Here is a before and after. I will update when we finally get it painted, trimmed, and caulked but its amazing how much better it is!! 


THANKS DAD!!!!!!

Friday, April 26, 2013

Front Hall Closet Part 1

I am very excited for this weekend!!  My dad has been working hard at our front hall closet and this weekend is installation time!!!!!  I'm finally going to have a FUNCTIONAL AND PRETTY front entrance!  Still no heat... but pffff who needs heat when you have a new closet!! (FYI new furnace comes Tuesday...)

So just to remind you, this is our front closet as it looks when it has been cleaned up... normally there are shoes and jackets EVERYWHERE!!


This is the problem area... As I said in this post the Ikea wardrobe I have owned for about 10 years and it was used in the meantime until we could come up with a plan. We had originally thought of doing a storage bench with hooks but have since decided against it as I want doors to hide the mess!!!  The white cabinet next to it is actually a bathroom cabinet we had in the old house in the bathroom (who would have guessed!).  We use it for Norah's mittens and shoes and my purse storage.  It worked but lets be honest it looks horrid!

As I already said originally we wanted to build a bench with hooks but we have too much stuff and I wanted to be able to easily hide it.  However, doing a rectangle closet wouldn't work with our stairs since the bottom landing is angled.  So we just sat on it until I came across an awesome idea on Pinterest here. A corner bench.  I still knew I didn't want a bench and hooks BUT the idea of utilizing the corner intrigued me.  So I searched further for a corner wardrobe.


That's when I found this. Yes it is an entertainment cabinet but the idea of a corner wardrobe just kept building in my mind!

I called my Dad and we talked through it. I measured the space and using excel I put together a SUPER rough drawing of it.  I knew I wanted a corner closet that went all the way to the ceiling. I knew I wanted the top to be a smaller extra storage cabinet for off season stuff. I knew I wanted there to be a shelf unit up the right side of the cabinet where I could put baskets with hats/mitts etc. That is what I knew. Everything else I left up to my Dad. He spent some time researching and came back with an awesome to drawing and got working on it.  It will be installed this weekend so I'll have an update for you next week but for now this is how it looks. The majority of the project has to be built in place but this is the door and frame as well as the side shelving unit.


This is the side shelf.  I am SO excited to see this all put together!!
Have a great weekend!!

Wednesday, April 24, 2013

Up Up in The Sky Nursery Part 2

The nursery is progressing and I couldn't be happier!!!!  Its turning out better than I imagined!!!  This is very exciting for me because last week we had another AHHH WHAT THE @#($*@#(%&!(@!#! moment when our furnace crapped out on us!! We have been without heat for a week now... argh!  Luckily it hasn't been TOO cold so space heaters are enough to keep us warm but it sucks!  The new furnace comes this week sometime.   Anyway, back to the nursery!!

In my last post I had already showed the painted rainbow above the crib (see plans and rainbow here).  I was so excited to start the hot air balloons that the next day I ran out to Dollarama to get chinese lanterns.  Of course I could only find them in green... but that didn't stop me! Using craft paint I painted white on all of them and then decided to paint one blue and one a yellowy green.  The original plan was to paint one pink if it was a girl (which I am happy to announce it is!) however after seeing the look of the greens and blue I decided I love it just the way it is!!!  I also bought little woven brown baskets from Dollarama and using ribbon and a TONNE of hot glue I glued these babies together! Then to hang them I used dental floss and screwed them right into the ceiling.  I LOVE THEM. We decided to hang them over the rocking chair because I don't want them falling into the crib (always being super cautious!!!). Falling on my head is ok... but on baby it is not!!


As you can see we also installed crown moulding in this room (as well as all the bedrooms).  We came across the crown moulding on a random outting to Rona. It was $4.76 for an 8 foot section! AMAZING deal... thats like 50% off! Plus we got 15% back in gift cards.  So for $121 we had more than enough moulding for all 4 bedrooms upstairs.  We still have to caulk and spackle the gaps but we'll get to that! Here is the one side of the nursery complete! I am in love with it!


Next up I found some super awesome prints on an Etsy shop Lily Cole Designs and immediately fell in love!! The issue was that the 4 white frames I had in the room were only 5 by 5's. So I messaged the shop and asked if it was possible to get them in that size.  To my luck they had no problem with it and quickly adjusted them. I haven't received the prints yet but I printed off the crap quality photo sample of them and put them in the frames just for reference.


I did splurge on the prints... but at this point I had spent about $3 on the hot air balloons and about $25 on crown moulding for the room. So forking over $40 for the prints I was ok with since I knew I didn't need to buy much else for the room!


I randomly decided this weekend to throw together a rain cloud mobile using felt scraps for baby.  I have a tonne of scraps left over from the Quietbook I made Norah (which she still LOVES). So I cut out little rain clouds in pink, white and black (always need a little black rain cloud!). I then sewed them by hand with white thread and stuffed them with random small bits of left over felt that was too small to do anything with.  Then using bright colours I cut out little rain drops. Using white thread I attached all of the rain drops to the clouds and attached the rain clouds to a small dowel I had lying around.  Then I used yellow ribbon to hang the mobile.  I haven't hung it yet but I think this is going to hang over the change table... not entirely sure yet!  I will update you soon!

We are currently working on cloud shaped shelves for over the change table... should have that completed this week! The room is almost done!!!