Wednesday, May 30, 2012

Super Exciting Discoveries!!!!

Yesterday I came across and amazing discovery/product while browsing Pinterest.  I honestly think this product is going to change my life forever!!!!!  I found it via this pin.  Now you had better sit down while I explain what Emily over at I Create With Love did.  There is a product made by Zinsser that is a stain primer, Zinsser Cover Stain Primer Sealer.

  Ok at first I was like what does that mean and why do I care??? Then I read further.... this product is a substitute for sanding!!!! YES THAT IS CORRECT!! I no longer have to sand down my projects.. I can just paint one coat of this wonderful stuff onto my project, let it dry (apparently it dries SUPER quickly) and then paint my project!!  NO MORE SANDING!!!!  You have NO idea how much I HATE the sanding part of projects!!!  Now this will only work if you are painting your project, unfortuantely if you want to stain it you'll still have to sand your project down.  But I'm telling you this has changed my way of thinking!!!

I have been wanting to paint my dining room chairs white for awhile now but the thought of sanding them all down has put me off doing it!!!!  BUT with this wonderful product it would make it soooo easy to do!!! I HAVE to test this out!!!!  I did a little research and so far all the people I have read about who have tried this say it works wonders!!!!  Can't hurt to try it out! Can you tell I'm super excited about this discovery!! 

Check out what I Create with Love did with it... remember NO SANDING INVOLVED!


I can't WAIT to try this out on my chairs!!!

Ok onto my next discovery!  I ordered a BUNCH of products from Decoart.com.  As previously posted I have been making jewelry displays and selling them at my online shop here. I have a BUNCH of left over sheets of glass from the picture frames I made and decided I wanted to make stained glass projects with them.  SO I ordered some amazing glass stains/paints and last night I had a chance to test them out.  So here is my little review on a few products. (No I have not been paid by anyone for this review, it is just my opinion of these products)

Here is my painted swatch of glass with 5 different types of glass/ceramic paint.  (sorry its hard to take pictures of glass!)


Starting at the top the blue is an Ultra Frost paint.  This one makes the glass slightly foggy and matter.  I think this one would be awesome as a base coat and then I would use the Glass-tique paint overtop to give it some tecture and glossiness to it.  Overall I love the colour of it!! The best part about all of the paints/stains I got is that they are air dry! You just leave them for about 7 days to cure and then its dishwasher safe etc! SO you can paint up vases and cups etc and make them your own!!


Next paint down (the green) I tried out Ultra Gloss Air Dry Enamel.  This is (as the name states) and air dry enamel which means you leave it for 7 days to cure and its scratch resistent etc.


I LOVE this one!  It is slightly more opaque than the other paints/stains tested but when you put it up to the window it looks amazing and still lets the light through!  This paint is great for stained glass or all ceramics and plastic! I may have fun and use this on our white cups at home to give them a little flair!!!

Next up is Deco Art's Glass-Tiques paint... This is AMAZING!!! I want more of this!!!  It is a paint that leaves tecture when dry!  So you can use just a brush or a sponge or paper to apply it and you are left with that tecture when it dries. 

I used a paint brush to put it on and it left this awesome brush stroke tecture when finished!  I know the photo is hard to see since it dries pretty much clear with a slightly pink tinge to it.  But this is an amazing way to give cheap vases and cups an amazing tecture and make them look a million bucks!!


Last up is a new product by Deco Art - Glass Stain.  This is what I plan on using for most of my stain glass projects.  I was experimenting and didn't smooth it out properly.  The one thing I found with this stuff is that it dries quickly!! Thats why my test patch is swirly, I was trying to fix my oops and it was starting to dry.   

 I plan on making a bunch of cool stained glass pieces and this is definitely my favourite for that purpose becaues it is the most transparent!! However, when held up to the glass after only one coat of paint the colour is very subtle.  I may change my mind and use this for staining vases and the Ultra Gloss paint for stained glass. We shall see.


Finally I picked up Liquid Rainbow. This stuff is super cool!!!  Using the black leading liquid rainbow, you outline a picture on top of a flat surface (I used a piece of plastic) and wait 1-2 hours for it to dry.


Then you use the coloured liquid rainbow paints and 'colour' (fill) in the picture.  Let it dry for 24 hours. Then you can peal it off and it becomes a gel like window decal that you can put on any glass surface. Norah LOVES this package of window gel decals that a friend gave her and this product makes it so I can make them for her!!!  Here is the butterfly I made last night! I have to wait for it to dry but tomorrow I plan on putting it on her window!! This is such a fun product for kids!!!


Now you might be asking what I plan on doing with all of these products.  WELL I would LOVE to create something like this (found via Pinterest here) on Suzys Sitcom.  She did hers using paint and glue but I LOVE the colours and design. I could EASILY do something like this with my paints.  I also have a black paint that is specifically for outlining projects!! 


 That is it for my discoveries yesterday!! It was a VERY exciting night for me! For Ryan however... he is not so excited because it means MORE CRAP all over the dining room table as my bazillion (yes its a number) projects are taking over everything!!!!!  I promise to update you on these projects when I get a chance!


Tuesday, May 29, 2012

Play Kitchen Progress Part 1

Over the weekend I had a chance to work on the play kitchen and I'm telling you it was FUN! I got to pull out the drill and the jigsaw and get down and dirty!!!! The dust was flying, the noise was loud and I was having a BLAST!!!!!  There is something so soothing about holding a saw and creating something totally awesome! Anyway down to the details. Remember this nightstand?


Well it currently looks like this!!!  I forgot to take pictures of the progress because I was just having so much fun with my power tools!!!  FYI for anyone reading this a hand sander WOULD BE an AWESOME present for me (ours is toast!).


Now more on what I did.  First I picked up a metal bowl for the sink at Dollarama (gotta love that store!!) and drew a circle on the top of the nightstand.  I had to make sure it wasn't right on the edge or else the top drawer wouldn't slide in and out because it would catch on the bowl. Then I cut inside my drawn line about a quarter of an inch so the bowl wouldn't fall through and I had a lip to glue the bowl onto. Here is my somewhat even bowl hole. I didn't make it perfect because you won't see it once the bowl is installed and glued in place.


Next I measured off a window for the oven... I used 2 of Norah's books pushed together to make the perfect size... hey they were the perfect size and I knew they would even! No measuring tape for me! lol.  Then I used the jig saw to cut this hole out as well.  Now the edges on this are not straight so I plan on using some quarter round edging to even it out and hide my ugly cuts. My plan is to use some screen to cover the hole so you can still see in and the quarter round will hide the edges of that too which is perfect! Here is the oven window (sorry having issues turning the photo again... argh)


After those two holes were cut it was time for some sanding. I sanded down the whole nightstand.  I wanted the inside of the oven to be dark (because an oven is dark inside!) SO I taped off the edges that I wanted to be light later on and spray painted the inside black.  I decided on one coat of paint inside for a slightly unfinished blotchy look, closer to the inside of an actual oven rather than a completely coated black inside.  I like the streakiness on the inside, it gives it character!!  

Finally I pulled out some primer and primed the outside of the entire nightstand.  I even managed to sand down the high gloss laminate sections and prime them as well. It actually worked better than I expected it to so I may have to change my plans... we shall see.  I forgot to take a picture of the primed oven but believe me its white now!!  So this week I'm hoping to finish priming and painting the oven so I can move on to building the back piece and shelf! But so far I'm LOVING IT!!!  Wait till you see the fun finishes I have for this!!!

Monday, May 28, 2012

DIY Play Kitchen Plans!

This week something VERY exciting happened!!!  A friend asked me if I would convert an old nightstand she had into a play kitchen for her daughter.  I didn't even have to think twice about it! I just jumped at the opportunity!  Ryan and I have such awesome plans for this lovely nightstand!!


Its honestly the perfect nightstand turned kitchen!  It already has a drop open door for the oven!!  SO now here is the plan.  After perusing Pinterest and other websites online I think my favourite play kitchen is this one from Dwell Lovely.

I just love how cute it is!!!
The night stand is partially laminate... a high gloss laminate at that. SO instead of fighting to sand/paint the laminate sections (mainly the fronts of the doors) and risk ruining the whole thing. So here is the to do list to make it into the play kitchen.
* decoupage the laminate sections with a fun paper or wallpaper - covered in a sealant so it doesn't peel or rip off
* Sand and Paint the rest white or pale blue (undecided yet)
* Cut hole for the sink
* Cut hole in oven door (May omit this step depending on how the door is made)
* If omit above step then paint a 'window' for the oven
* Paint burners on - I bought metal trivets that look like burners that I'll attach over the dark painted circles
* Install oven knobs - I picked up some awesome bright knobs at a warehouse sale that will work PERFECTLY!
* Make a backsplash and shelf for above the oven
* Paint backsplash with magnetic paint
* Paint a fun design over magnetic paint to create a 'tiled' backsplash look
* Make a blackboard on one side of the oven
* Install towel rack on other side of the oven
* Put hooks below the shelf to hang kitchen utensils from
* Lights - If it will work I want to put a push light inside the oven and push lights under the shelf.  I may nix this one but I think it would look awesome!!
* Oven rack - I have an awesome idea for making an oven rack for inside the oven using dowelling.  Hopefully it works out!! 

Whew I'm tired just writing all of that!!  Now I have a timeline... this baby has to be done by June 13th!!!  So I'd better stop typing and get on it!!!  Wish me luck! I'll be back periodically to let you know how my progress is going!

Tuesday, May 22, 2012

Adventures in Reupholstery

Remember WAAY back in January when I announced I was going to attempt to reupholster a chair here. And then again in March when I actually started the project by painting the chair here. WELL I finished my chair on the weekend and am SOOOOOO HAPPY with the results. It was definitely an adventure as I literally have NO idea what I was doing when I started this project!! Now it isn't perfect but I am very proud of myself!!! SO first lets recap what I started with, here is the chair that had been sitting in my basement for way too long collecting dust.


Then I sanded it down, and primed and painted the arms and legs white.  Next came the part where the chair sat in my living room because #1 I didn't have a staple gun (yes I know how could I 'Miss Crafty Pants' NOT have a staple gun!!!) and more importantly #2 I have NO IDEA how to move further!!!  Well last week I went out and bought a heavy duty staple gun for this and other projects!  On the weekend I woke up and decided what am I waiting for lets get this baby done!! 

Now I would LOVE to be able to give you details on how I reupholstered this bad girl (yes the chair is feminine!) but I honestly don't know what I did... I did a little of this and that until it looked good.  SO here is my best rundown of this project.

FIRST I placed my new fabric over the seat cushion of the chair and loosely tucked it around. Then leaving WAY more fabric than I needed I cut a piece in the approximate size of the seat cushion. Then I started to staple and pull and tuck... yes I know not helpful details I realize! Ultimately I started at one end, pulled the fabric tight and stapled then I worked my way around the seat stapling. When I came to around the legs I cut sections of the material so it would lie flat but under the raw edges of the material that hit the arm of the chair so it wouldn't fray. Around the legs of the chair I stapled the material and then cut away the excess afterwards as I knew I was going to be putting trim around it there to cover the staples.  See my nice folded corner below.


Next it was time for the back of the chair.  I had NO IDEA how to duplicate the pleats. So first I started off by laying my material over the chair and using a ruler I tucked the fabric into the pleats for the meantime.  Next I started stapling the fabric around the back of the chair and cutting off the excess.  This was actually easier than the seat of the chair! 

Here is the back of the chair (sorry the picture won't turn the right way for some reason!).  After I used a large needle and just tacked the pleats in place at the bottom.  I didn't need to do anything at the top because of the way I stapled it to the back so just a few stitches in the bottom crevice of the pleat worked well!


My chair was looking impressive! It wasn't perfect ... but I was happy with it thus far!  See my slight oops here... I didn't pull the fabric tight enough and it puckered... but its so small it isn't that noticeable. Plus that side of the chair will be against a wall anyway!
+

Then it was time to do the back of the chair.  This was the easiest part! I just pulled the material tight against the back and stapled it up the sides and at the top. I knew I could cover the staples with the decorative trim so I didn't mind stapling it at the top.


After about an hour and a half I had transformed my chair into THIS!!!!


 But I wasn't done yet, you could still see the staples! Next I pulled out the glue gun and glued my trim around the edges covering MOST of the staples.  Like I said before this was my first attempt at reupholstering and some of my staples were further in that they should have been... BUT for the most part the staples are covered! I glued under the raw edges to make it look more finished as no one wants to see raw edges!


It was done and I am VERY proud of myself!  So to save yourself having to scroll back up.
BEFORE


AFTER!!


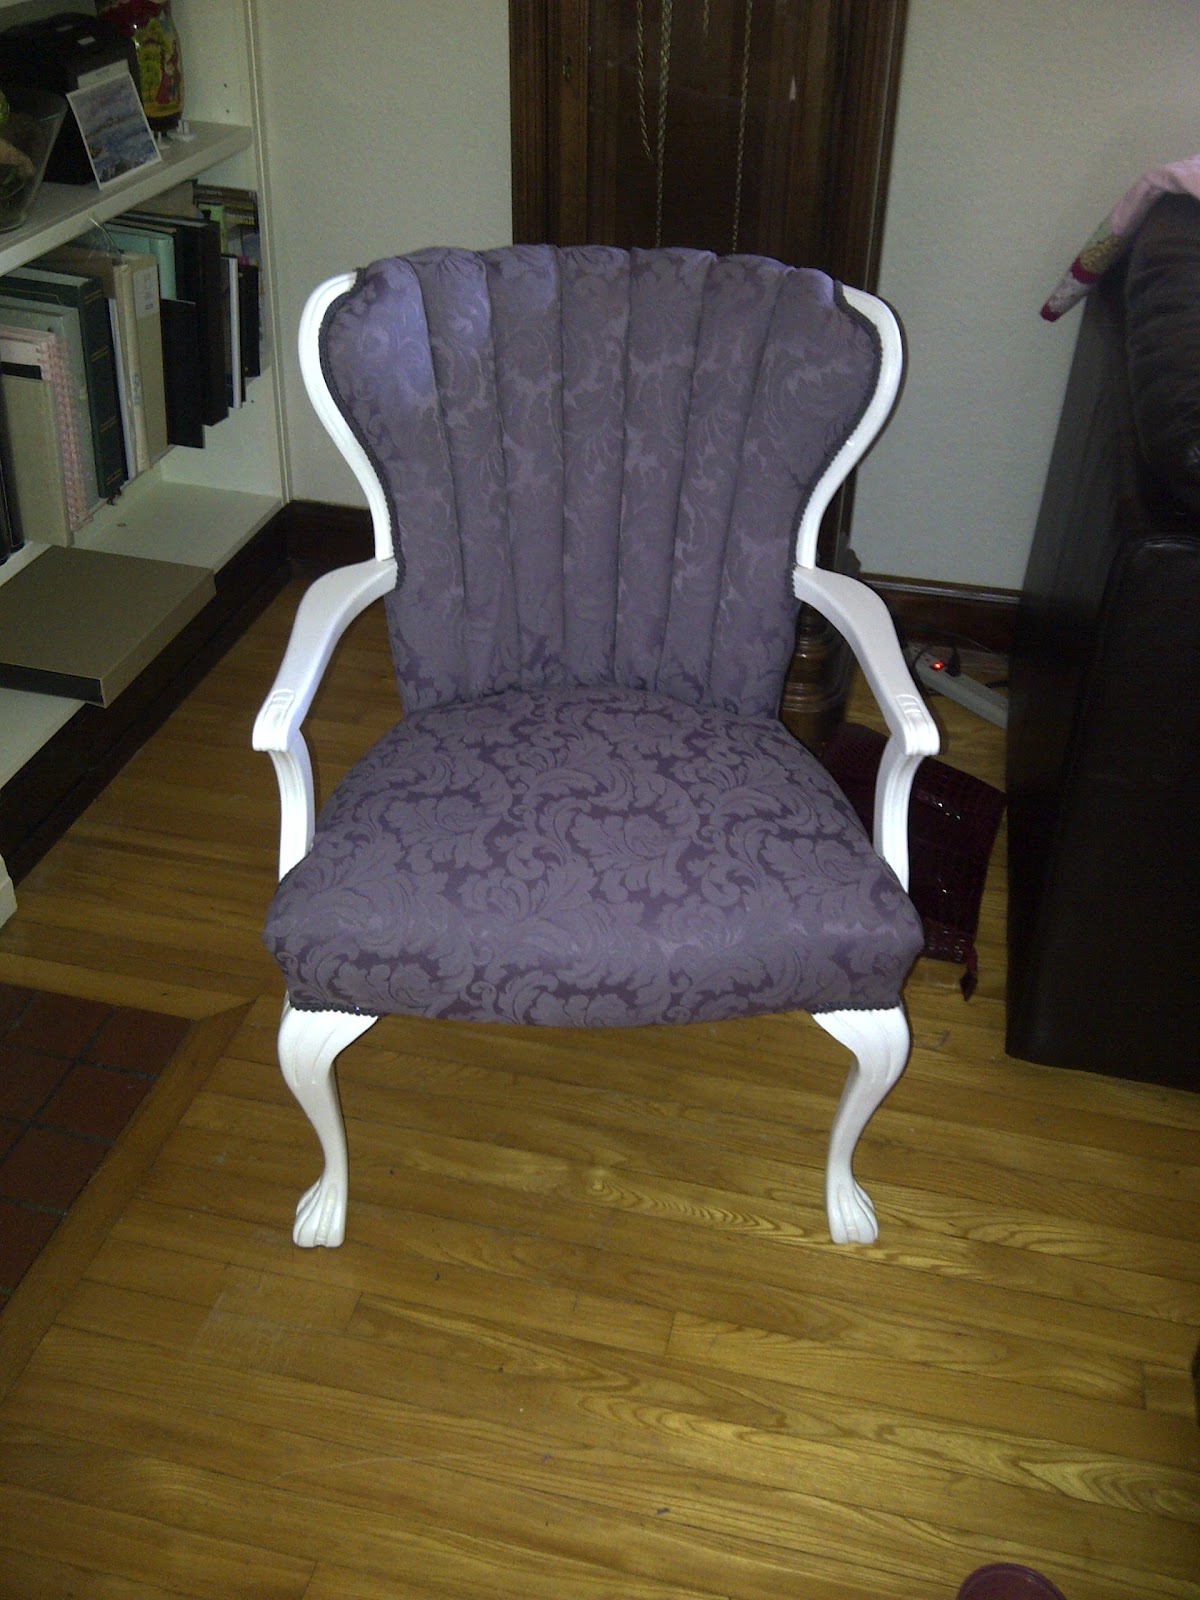
Now I just need to clean up our bedroom and make room for this beauty!!! 

Thursday, May 17, 2012

Open For Business

WE ARE OPEN FOR BUSINESS!!! 

 Ryan and I decided to open a Live Love Laugh and Renovate Etsy shop!  What are we selling you may ask??? Anything and everything!! Ultimately when we come up with a brilliant project that we love to make we will be posting duplicates of it at our shop for you guys to buy!!!  We are starting small but check back to our shop weekly for new items!!! And just for fun here are a few anticipated FAQ!

Why did we decide to open up shop??

Two Christmas's ago I made some of my ladies awesome jewelry display frames as presents.  I found some amazing wood picture frames at a garage sale and turned them into a display for all of their necklaces and earrings.  It wasn't until about a year later when 2 of my friends had displayed them that I started getting questions on "Where can I get one of those?" I have been thinking about making them and selling them for awhile now but had to wait until Garage Sale season!!!  WELL its upon us and last weekend Ryan and I picked up some more GREAT finds and TA DA! Here we have it our own little shop!!  This is only the start of course. As I make more things I plan on selling them as well! (Below are a few items available for sale)


What other things do you plan on selling?

I love to knit and have run out of people to knit things for!  So I plan on adding some lovely knitted items for the fall/winter.  Of course there will be the jewelry frames, lots more of those to come! As well we plan on upcycling other items and selling them too!  I promise to update everyone here when we add new exciting items!!


Where is your Shop?

WELL just head on over here to the Live Love Laugh and Renovate Shop

Wish us luck!!!!  If you haven't already discovered Etsy its a GREAT site to browse for handmade items!!!!

Friday, May 11, 2012

Weekend Rundown

This weekend I have a bunch of projects I would like to tackle!!  First off, Ryan's mom left us 2 gorgeous oak dressers that we want in our bedroom but just haven't had a chance to move them into the room and move the old dressers out!  Here is one of them in the spare room.  So that switcheroo will happen this weekend and free up some room in the shed!!

Speaking of the dressers, my dad is making us nightstands to match the dressers!! YEAH!! I can't wait to have a nightstand! Right now we are using living room end tables that are WAY too big and taking up too much space!! My dad sent me these pictures this morning! I LOVE IT so far!!


On other projects, I bought this amazing peacock material and I am going to recover the roman shades in our living room.  The ones that came with the house are so well made that I have hummed and haaed about redoing them but I've hit the point where I need colour!!!! the current blinds are literally the colour of the walls and blah! I LIKE COLOUR!!! So this beauty will eventually be tackled! Just have to wait for the material to arrive!!


Next on our weekend project list is to fix our church pew.... unfortunately it isn't holding up to the weather too well!  As you can see it is splitting apart!  SO I went out and bought yet another type of sealer! This time this one is specifically for sealing wood that is by water! So lets hope it works!!!!


It is supposed to be gorgeous this weekend so I plan on putting plants in our planters outfront and back. As well as painting some more picture frames because I have an indoor picture wall gallery project in the works.  I also have an awesome plan for another canvas for the living room!!! All these projects will be posted next week hopefully!!!  Oh and I plan on finishing up the pillows for outdoors that I started, they are sewn I just need to handsew the last few inches on the 6 pillows! that may be a task for tonight while watching a movie!

Monday, May 7, 2012

Weekend Art Project

This weekend Ryan and I escaped up to the cottage.  We needed a little away time but that doesn't mean we didn't do any house projects!!!  I have been looking and looking and looking for some art for our bedroom walls.  I wanted 2 pictures, one for either side of our window in our bedroom.  Just a reminder our bedroom is painted a grayish blue and we have our beautiful diyed wallpaper headboard (see here) which is silver and white.  And eventually (whenever I finish it) we will have a silvery purple chair in the room. Anyway, I have been looking for something for the walls in the bedroom. I wanted something fun that would tie in the purple chair and silver headboard but as much as I looked I couldn't find anything I wanted.

Then while browsing Pinterest I came across this lovely tutorial from Its Doable blog.  I LOVED IT!! Isn't the canvas beautiful!!!!


I knew I wanted to test it out and see how it looked but I didn't want to spend a lot of money because I've tested stuff like this out before and its looked AWFUL!!!  I put it to the back of my mind because I knew the canvas alone would be about $15 each.... THEN while at Dollarama picking up some party supplies I discovered that they sell canvases for $2 for a 16 by 20 canvas!!! WHAT!!!! I grabbed 2 (wish I had grabbed more!) I also picked up some silver and purple paint from Dollarama... seriously I love that store!!!

I told Ryan he would get to create one and I would get to create one. I also told him he could do whatever he wanted with his as long as it went with the bedroom.  I wanted to create a streaky silver and purple look for the background of my canvas.  So I poured a bunch of silver paint into a bowl and a smaller amount of purple and only slightly mixed them together, this way I had swirls of purple throughout my silver paint.  For Ryan's we added spots of blue to the silvery/purple paint for a slightly different look.  Here is my swirled paint bowl below.


And my silvery purple canvas... sorry bad picture, apparantly the lighting was bad on all the ones I took at this stage...

Here is Ryan's canvas with the background. See the streaks of blue!


Now I forgot to take pictures of the next few steps.... Anyway, I cut out a bunch of leaf shaped pieces of paper in various colours that I had on hand.  Then I placed them in a pattern on my canvas, I did end up switching up the colours a bit as originally I had put a bright pink it but it looked bad so I switched it up for a nice lime green.  Then once I had the placement correct I used Mod Podge to glue each piece down and then covered the whole canvas in a layer of Mod Podge.


Now back to Ryan's canvas... I had said he could do whatever he wanted... well I should have said whatever he wanted within reason... his FIRST layout was of an inappropriate hand gesture.... He just smiled when I looked at him and said "Well you said I could do ANYTHING!" argh!  Then he came up with a great idea! He wanted to have a path to nowhere. I loved the idea and he placed it out and with a little help from me (Ie. convincing telling him not to pain toes directly on the egg shaped paper cut outs as well as showing him that when you make a foot print the toes aren't directly attached to the sole of the foot....) He came up with this! I love it!! He opted not to do toes on the 'feet' at all after it was glued because it looked great the way it was!


After the Mod Podge dried this is what we were left with!


And Ryan showing off his art!
 And both of them together!

The best part about it all is when we got them home they look FANTASTIC in the bedroom! They tie everything in SO WELL!!!  I LOVE THEM! I haven't had a chance to take a picture of them in the bedroom because lets be honest... its a MESS right now! But I promise to take a picture soon!!!  That was our fun art project!

Speaking of art projects, while we were working on this Norah was having fun drawing on the cottage floor with crayons.... OOPS!! Sorry Grandma! (Don't worry we cleaned it up!)