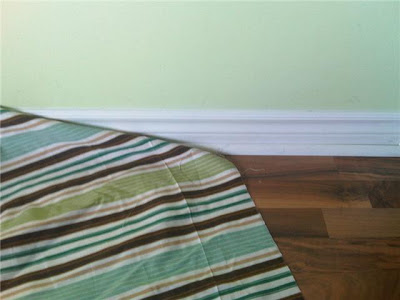
For the past month I have been scouring around looking for the perfect fabric for our living room curtains. Our living room walls are Behr Cabbage Green paint which is fairly bright. But we have toned down the brightness with dark furniture and medium brown flooring. I had temporarily put dark brown Ikea curtains on the windows but hated them. It was too dark and since we don't get a lot of sunlight in the living room I really wanted to find something to lighten the whole room up. WELL I was VERY successful this week. I found a fabric that I thought would be PERFECT but was sorely disappointed to find that it was $35 per yard!! AHHHH that's outrageous! SO I went on a serious hunt and on Wednesday I found it. I wasn't entirely sure how it would turn out but for a measly $4 per metre (at Fabricland) it was a steal!! I bought 6 metres just to be safe, plus I want to make pillows to tie the entire room together. Doesn't it blend the colours of my walls and floor perfectly as well as adding in a little zing with the blue stripe??
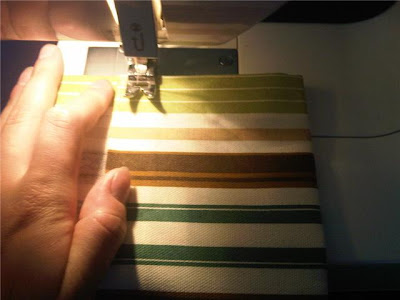
For those of you who know me well you know I love to sew but at the same time I get lazy and sewing straight lines bugs me. SOO I went the easy way out and used hem tape for the sides and bottom hem of my curtains and am VERY happy with the result. Here is what I did.
First I measured my window, then added 1inch for the bottom hem and 5 inches at the top for the top hem, I wanted a big fat top hem. Next I lay out my material on my living room floor and measured (twice) how long I wanted the material. Then to make sure I cut it evenly I lay it next to my area rug and cut along the edge of the rug so I had a nice even piece of fabric.
Then I got out my trusty hem tape. I was lucky with my window because the fabric I got was the perfect width so I didn't have to cut it and could use the finished edges on either side. But I still had to hem them in an inch. I first ironed the sides of my soon to be curtain an inch in. Since I was dealing with stripes it was very easy to keep things even, I didn't even have to pull out my ruler!!

After I had the edge ironed I took out my hem tape and put it in the fold and pressed with the iron for a few seconds. VOILA, instant hem!! Make sure to get an extra strong hem tape, some of the cheaper tapes end up coming loose after a period of time.

I completed that on the 2 side edges of both of the 2 curtain panels. Then I did the same on the top edge of both panels. Always leave the bottom hem to the very end because if you make a mistake with the top edge you can always make up for it in the bottom hem. After hemming the top down an inch it was time to make the rod pocket. I folded the material down about 4 inches and ironed the material to make it easier to sew.

Then I pulled out my wonderful sewing machine and making sure the seam was even I sewed the material in place. To make sure I was sewing even I put a piece of tape on the sewing machine so I knew where the edge of the material had to be.
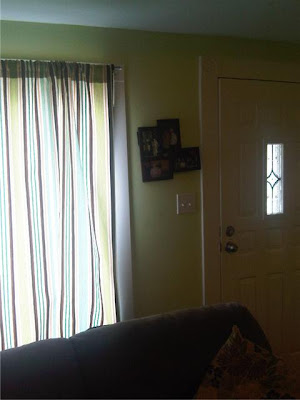
I did this on both panels and then it was time to hem the bottom. I pulled out my hem tape and did the exact same thing I did on the side edges. The only extra step I did was after the first panel was finished I lay the second panel on top of it and made sure the second panel would be the exact same length as the first panel. Then I ironed the hem away and hung my curtains. Ryan walked into the room at this point and was amazed!! He was a little skeptical about the material I was using but LOVES the end result!!! What do you think??


 You can find the tutorial on how it was created
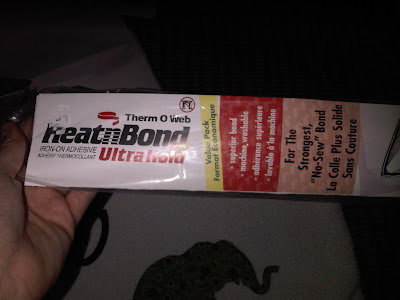

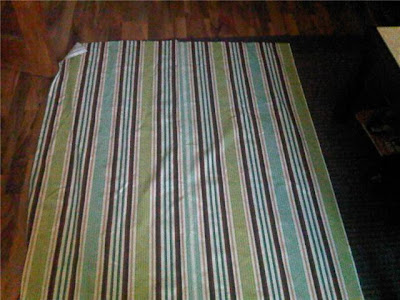
 I plan to do some more hearts on the wall eventually, but for now I'm going to see how I like it over the week. On another note, here is a picture of what some of the other fabric I bought on my trip was transformed into. (I would like to note that I did make the bed and no matter what I did it looked lumpy. The duvet was being particularly fussy and lumpy.. It needs a good beating to put it back to shape.... which I will be doing shortly) :-)
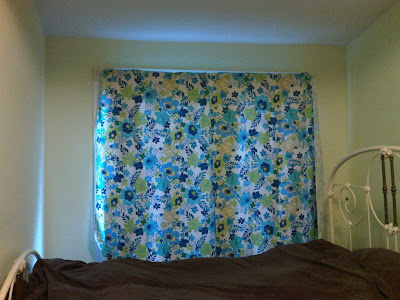


 Needless to say it was about time to paint the front door!! SO on the weekend I pulled out my trusty sand paper and got down to work. It was hard work sanding down the door but an hour later I had not only sanded it down but gotten all of the reminents of the stickers off the door as well as cleaned the door top to bottom. Then it was painting time! Since Ryan bought too much railing paint I pulled out the can (it was made for outdoor doors and railings so I was able to reuse it). I put down plastic so as not to drip all over everything (I'm a VERY messy painter!!). I also used some left over red tape to tape off the doorknob/lock and window so as to not get brown paint on it. And away I went! This is my door now! A little bit lighter but it looks SO much better!!! (the red tape still has to be removed, it was very wet still). I left the door open (luckily it was a nice day) all day so it could dry and so it didn't stink like paint in the house!
 So here is what I started with today!
 See the 3 feet of space!! The biggest task was cleaning the cabinet. It hadn't been cleaned since before we moved into the house.. the only spot in the entire house that wasn't cleaned! SO I tackled that first with a cloth, soap and warm water. It didn't take too long! The cabinet is made out of chip board so it has a lot of sharp edges. I didn't want our towels to get snagged so I found some shelf liner that we had lying around the house. And after cleaning the cabinet it was time to install the shelf liner.


